
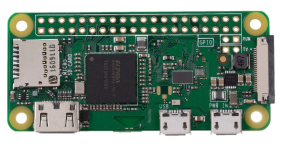
Turning Your Old Raspberry Pi into an Ad Blocker: Say Goodbye to Online Ads
Do you have an old Raspberry Pi collecting dust? Here is the project you’ve always wanted to find, Transform your old Raspberry Pi into a powerful ad blocker. With Pi-Hole and a few simple steps, you can enjoy a cleaner, ad-free browsing experience on all your devices. In this article, we’ll guide you through the process.
What is Pi-Hole?

Pi-hole is like a smart tool for stopping ads on your whole network. It can block ads on websites, mobile apps, and your smart TV. You don’t need any extra software on your devices for it to work. Pi-hole makes your internet faster by stopping ads from even showing up. It also helps save your data if you have a data limit. With a simple interface
and a lot of options to control every part of it.
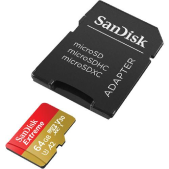
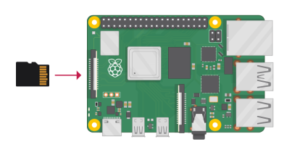
2-Micro SD Card :
You need an SD Card to install the required system on it, at least 8GB, you also need an adapter if your computer device doesn’t have an SD card reader. Buy Here
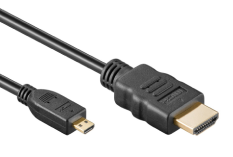
We need it to connect to any HDMI display to configure our Raspberry Pi
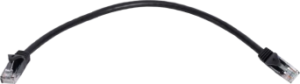
4- LAN Cable:
We need a LAN Cable to make a connection between the Raspberry Pi and our network. Buy Here
5- Your computer:
You need to use your computer to set up the whole thing.
Thats it! now you are ready to follow the tutorial and complete your project.
Installing Raspberry Pi OS Lite On The SD Card:
We start by preparing our Raspberry Pi’s operating system which we
Will be using it to install Pi-Hole later.
First of all, we need to install “Raspberry Pi Imager” which is software that allows us to easily install the Raspberry Pi OS in our SD Card. Download it from here
After clicking the link above you should see a “Download for Windows” button or “Download for macOS” depending on your device, click it and it will be automatically downloaded.
After the download finishes, you have to open it to run the install, It’s a simple installation process.

")
After finishing the installation, open the program and you will see this interface which is very simple and easy to use.
")
")
Now you need to insert the SD Card on your device
We are almost there! Not a lot remains to finish.
Now on “Raspberry Pi Imager” click on “CHOOSE OS” Which will show you all the operating systems, but we need to choose just one which is “Raspberry Pi OS Lite” which you
can be found when clicking on “Raspberry Pi OS (other)”.


Now click on “CHOOSE SD CARD” and all the available SD Cards will show up, you need to choose yours
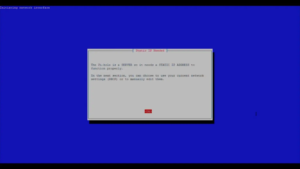
IMPORTANT NOTE this step will format all your data in the SD Card
The last step here is to click on “WRITE”, Now take a rest and wait until it finishes, it may take some time.
Congratulations! You successfully installed the OS, Now unplug the SD Card from your computer and plug it into your Raspberry Pi, then plug the
HDMI cable and the power cable.
First Boot :
The system will request a new username for your account, connect a keyboard to your Raspberry Pi, choose a name then type it, and remember it, then it will request a password.” It’s very important to remember them”.
After that, if you see a black screen with text on it don’t worry! Actually, this is what you should see, this is called a “Terminal” which is a fully functional system that works with the commands only, let’s continue.
Installing Pi-hole On Your Raspberry Pi:
Are you excited for your first command? Now in the terminal type the following :
curl -sSL https://install.pi-hole.net | bash
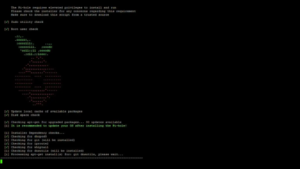
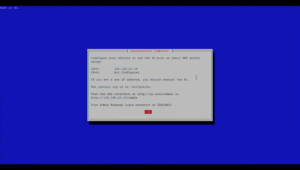
The Pi will start downloading and installing the software. It takes a couple of minutes to run through and you’ll then get to the following page to guide you through the Pi-hole setup.
In most cases, you can simply go with the default options and click OK. Don’t tinker with these settings unless you’re confident in your knowledge; otherwise, you might end up with a non-functional Pi-hole.
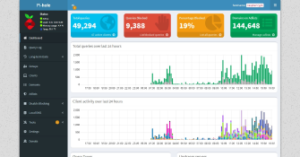
When you finish installing, you’ll see a message that says “installation complete.” Remember the Admin Webpage password because you’ll use it later to log in to the Pi. You’ll need it to check detailed stats and make any changes. You can change this password on the website, but you need the original password to do that.
Setting Up Your Router To Direct DNS Requests Through Your Pi-hole:
Go back to your computer and click start, Search for “cmd” and a window will open

Type ipconfig َ
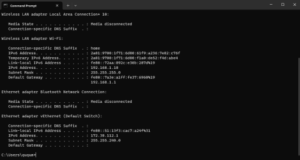
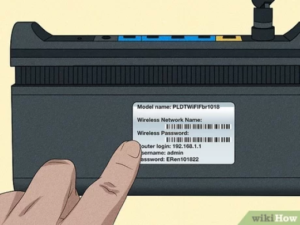
copy ‘Default Gateway’ and open it on your browser, this will take you to the admin panel for your router To log in you have to get the username and the password usually, it will be under your router.
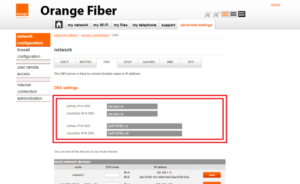
After login go to DNS settings in your router
Here you’ll need to set your Pi-hole’s IP address as the primary DNS server, if your router has to have a secondary DNS server, then type the same address into that field as well. Click save or apply to make the changes. You may then need to reboot your network devices to take effect.
Finally, you are all set! enjoy your Ad-Free experience.